The Elovation Ruby on Rails application was written by Christos Hrousis. It can be used to track the results of two-player games like chess, table tennis and foosball. This 14th article in this series tells us how to install the Elovation Ruby on Rails application.
The Elovation application uses the Elo rating system created by Arpad Elo, a Hungarian-born American physics professor. You can also use the Trueskill rating system for teams with multiple players and still provide rankings for individual players. Elovation requires at least Ruby on Rails 5.1 and uses the PostgreSQL database for its backend. It is free and open source software and has been released under the MIT licence.
GNU/Linux
An Ubuntu 16.04.1 LTS guest virtual machine (VM) instance using KVM/QEMU has been chosen to set up Elovation.
The host system is a Parabola GNU/Linux-libre x86_64 system, and Ansible is installed on the host system using the distribution package manager. The version of Ansible used is 2.4.3.0 as indicated below:
$ ansible --version
ansible 2.4.3.0
config file = /etc/ansible/ansible.cfg
configured module search path = [u’/home/shakthi/.ansible/plugins/modules’, u’/usr/share/ansible/plugins/modules’]
ansible python module location = /usr/lib/python2.7/site-packages/ansible
executable location = /usr/bin/ansible
python version = 2.7.14 (default, Jan 5 2018, 10:41:29) [GCC 7.2.1 20171224]
|
You should add an entry to the /etc/hosts file for the guest ‘Ubuntu’ VM as follows:
On the host system, let’s create a project directory structure to store the Ansible playbooks and inventory, as follows:
ansible/inventory/kvm/
/playbooks/configuration/
|

Figure 1: Home page
The Ubuntu 16.04.1 LTS server has Python 3 by default, and hence we can use the same with Ansible. The inventory/kvm/inventory file contains the following:
[elovation-host]
ubuntu ansible_host=192.168.122.244 ansible_connection=ssh ansible_user=ubuntu ansible_password=ubuntu123
[elovation-host:vars]
ansible_python_interpreter=/usr/bin/python3
|
You should now be able to issue commands, using Ansible, to the guest OS. For example:
$ ansible -i inventory/kvm/inventory ubuntu -m ping
ubuntu | SUCCESS => {
“changed”: false,
“ping”: “pong”
}
|

Figure 2: Adding a player

Figure 3: Creating a new game
Dependencies
The apt-daily.service runs by default on a new installation of Ubuntu 16.04.1 LTS. If we need to install software, the APT lock held by this service needs to be removed. Hence, we need to first stop this service. The APT software package repository is then updated before installing the dependencies to set up Ruby.
---
- name: Install dependencies
hosts: ubuntu
become: yes
become_method: sudo
gather_facts: true
tags: [apt]
tasks:
- name: Stop apt-daily.service
shell: systemctl kill --kill-who=all apt-daily.service
- name: Update the software package repository
apt:
update_cache: yes
- name: Install dependencies
package:
name: “{{ item }}”
state: latest
with_items:
- libssl-dev
- libreadline-dev
- zlib1g-dev
- build-essential
- git
|
The above playbook can be executed as follows:
$ ansible-playbook -i inventory/kvm/inventory playbooks/configuration/elovation.yml --tags apt -vv -K
|
The -vv represents the verbosity of the Ansible output. You can use up to four ‘v’s. The -K option prompts for the sudo password for the ubuntu user.
Rbenv
Let’s use Rbenv to set up Ruby on this virtual instance. It allows the installation of multiple Ruby versions, and the version in production can be selected. The source repo of Rbenv is cloned first, and then configure and make are executed. The Rbenv PATH and initialisation are then updated in the ~/.bashrc file.
- name: Build rbenv
hosts: ubuntu
tags: [rbenv]
tasks:
- name: Get rbenv
git:
repo: ‘https://github.com/rbenv/rbenv.git’
dest: “/home/{{ ansible_user }}/.rbenv”
- name: Build rbenv
shell: “cd /home/{{ ansible_user }}/.rbenv && src/configure && make -C src”
- name: Set rbenv PATH
lineinfile:
path: “/home/{{ ansible_user }}/.bashrc”
state: present
line: ‘export PATH=”$HOME/.rbenv/bin:$PATH”’
- name: rbenv init
lineinfile:
path: “/home/{{ ansible_user }}/.bashrc”
state: present
line: ‘eval “$(rbenv init -)”’
|
The playbook to set up Rbenv can be invoked as follows:
$ ansible-playbook -i inventory/kvm/inventory playbooks/configuration/elovation.yml --tags rbenv -K
|
A sample execution output is shown below for reference:
$ ansible-playbook -i inventory/kvm/inventory playbooks/configuration/elovation.yml --tags rbenv -K
SUDO password:
PLAY [Install dependencies] ********************************************************************
TASK [Gathering Facts] *************************************************************************
ok: [ubuntu]
PLAY [Build rbenv] *****************************************************************************
TASK [Gathering Facts] *************************************************************************
ok: [ubuntu]
TASK [Get rbenv] *******************************************************************************
ok: [ubuntu]
TASK [Build rbenv] *****************************************************************************
changed: [ubuntu]
TASK [Set rbenv PATH] **************************************************************************
ok: [ubuntu]
TASK [rbenv init] ******************************************************************************
ok: [ubuntu]
PLAY [Build ruby] ******************************************************************************
TASK [Gathering Facts] *************************************************************************
ok: [ubuntu]
PLAY [Postgresql] ******************************************************************************
TASK [Gathering Facts] *************************************************************************
ok: [ubuntu]
PLAY [Elovation] *******************************************************************************
TASK [Gathering Facts] *************************************************************************
ok: [ubuntu]
PLAY RECAP *************************************************************************************
ubuntu : ok=9 changed=1 unreachable=0 failed=0
|

Figure 4: Creating a new game with Elo rating
Ruby
Ruby-build is a command line utility to install Ruby. Its repository needs to be cloned into the Rbenv plugins folder. Ruby 2.4.0 is then installed using the rbenv command, and the same is set as the default global Ruby version in the following playbook:
- name: Build ruby
hosts: ubuntu
tags: [ruby]
vars:
rbenv_root: “/home/{{ ansible_user }}/.rbenv”
tasks:
- name: Create rbenv plugins
shell: $SHELL -lc “mkdir -p {{ rbenv_root }}/plugins”
- name: Get ruby-build
git:
repo: ‘https://github.com/rbenv/ruby-build.git’
dest: “{{ rbenv_root }}/plugins/ruby-build”
- name: Install Ruby 2.4.0
shell: $SHELL -lc “{{ rbenv_root }}/bin/rbenv install 2.4.0”
- name: Set Ruby 2.4.0 as Global
shell: $SHELL -lc “{{ rbenv_root }}/bin/rbenv global 2.4.0”
|
The above playbook can be invoked with the ‘ruby’ tags option as shown below:
$ ansible-playbook -i inventory/kvm/inventory playbooks/configuration/elovation.yml --tags ruby -vv -K
|
PostgreSQL
Elovation uses the PostgreSQL database, by default, as its backend data store. After updating the APT software package repository, we can install the PostgreSQL server and a few other dependencies. The PostgreSQL database server is started, and the Ansible playbook waits for the database to listen on Port 5432. A separate application user account is created in the database. Although we hard-coded the password in this example, in production, it is recommended that you use Vault to encrypt and decrypt the passwords with Ansible. The local authentication is changed from peer to md5 in the PostgreSQL pg_hba.conf configuration file, and the database is restarted. The Ansible playbook again waits for the server to listen on Port 5432, as shown below:
- name: Postgresql
hosts: ubuntu
become: yes
become_method: sudo
tags: [postgresql]
tasks:
- name: Update the software package repository
apt:
update_cache: yes
- name: Install dependencies
package:
name: “{{ item }}”
state: latest
with_items:
- python3-psycopg2
- postgresql
- postgresql-contrib
- libpq-dev
- name: Start database server
systemd:
name: postgresql
state: started
- wait_for:
port: 5432
- name: Create application user
shell: sudo -u postgres createuser -s pguser
- name: Set password for application user
shell: sudo -u postgres psql -c “ALTER USER pguser WITH password ‘pguser123’”
- name: Replace peer auth
lineinfile:
path: /etc/postgresql/9.5/main/pg_hba.conf
regexp: ‘^local all all peer’
line: ‘local all all md5’
- name: Restart database server
systemd:
name: postgresql
state: restarted
- wait_for:
port: 5432
|
The above playbook to install and configure the PostgreSQL database server can be run as shown below:
$ ansible-playbook -i inventory/kvm/inventory playbooks/configuration/elovation.yml –tags postgresql -vv -K
Elovation
The final step is to set up the Elovation Ruby on Rails application. The bundler software is used to track gems and the versions required by the Rails application. It is installed first and then the Elovation repository is cloned to the HOME folder. The config/database.yml file is created and the database credentials are updated. The bundle installcommand is executed to fetch and install the required gems for the application. The database is created for the application and the migrations are executed to create the necessary tables. The entire playbook to set up Elovation is as follows:
- name: Elovation
hosts: ubuntu
tags: [elovation]
vars:
rbenv_root: “/home/{{ ansible_user }}/.rbenv”
tasks:
- name: Install bundler
shell: “{{ rbenv_root }}/shims/gem install bundler”
- name: Get elovation
git:
repo: ‘https://github.com/elovation/elovation.git’
dest: “/home/{{ ansible_user }}/elovation”
- name: Create database.yml
copy:
src: “/home/{{ ansible_user }}/elovation/config/database.yml.example”
dest: “/home/{{ ansible_user }}/elovation/config/database.yml”
remote_src: yes
- name: Add database credentials for development database
lineinfile:
path: “/home/{{ ansible_user }}/elovation/config/database.yml”
insertafter: “ database: elovation_development”
line: “ username: pguser\n password: pguser123”
- name: Add database credentials for test database
lineinfile:
path: “/home/{{ ansible_user }}/elovation/config/database.yml”
insertafter: “ database: elovation_test”
line: “ username: pguser\n password: pguser123”
- name: bundle install
shell: “{{ rbenv_root }}/shims/bundle install”
args:
chdir: “/home/{{ ansible_user }}/elovation”
- name: Create database
shell: “RAILS_ENV=’development’ {{ rbenv_root }}/shims/bundle exec rake db:create”
args:
chdir: “/home/{{ ansible_user }}/elovation”
- name: Migrate database
shell: “RAILS_ENV=’development’ {{ rbenv_root }}/shims/bundle exec rake db:migrate”
args:
chdir: “/home/{{ ansible_user }}/elovation”
|
The above playbook can be executed as follows:
$ ansible-playbook -i inventory/kvm/inventory playbooks/configuration/elovation.yml --tags elovation -vv -K
|
You can then log in to the VM, and manually start the RAILS application using the following command:
$ cd elovation
$ RAILS_ENV=”development” bundle exec rails server --binding=192.168.122.244
|
The application will listen on 192.168.122.244:3000, which you can open in a browser on the host system. You will see the home page, as shown in Figure 1.
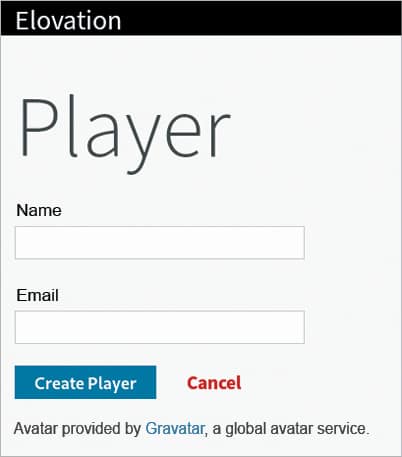
You can add a player by providing the name and e-mail address, as shown in Figure 2.
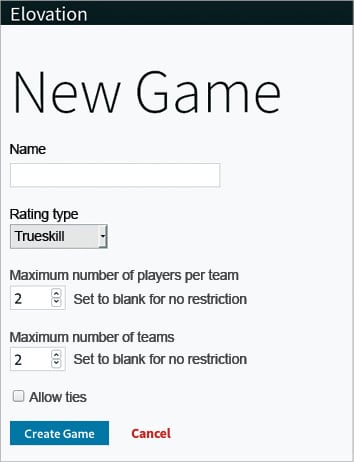
You can start a new game using the Trueskill rating system, as shown in Figure 3.
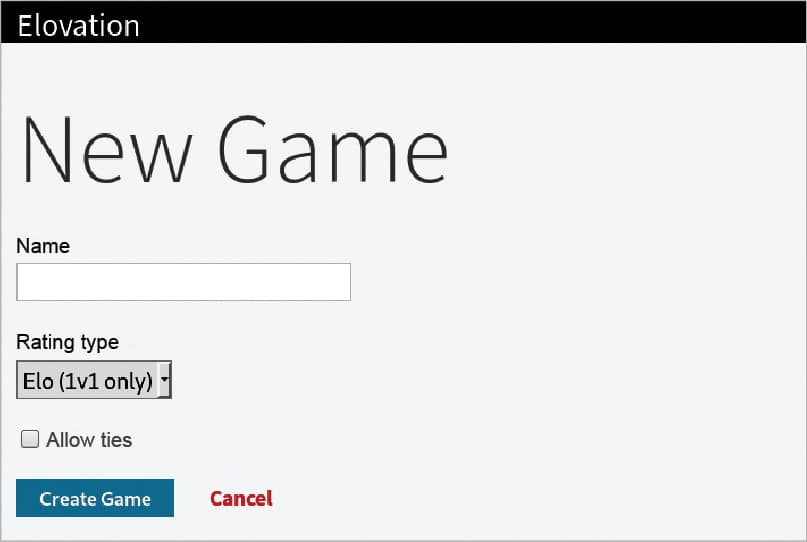
You can also create a new game with the Elo rating system, as shown in Figure 4.